
Keeping your kitchen clean and organized is essential for maintaining a healthy and functional space. Regular cleaning may help, but occasionally, you need to go the extra mile and give your kitchen a deep clean. This article will provide the ultimate step-by-step kitchen deep cleaning guide and checklist to ensure no area is left untouched.
Deep cleaning your kitchen is crucial for several reasons:
- It helps remove built-up grease, dirt, and grime, which can collect in hard-to-reach areas and affect the overall cleanliness of the space.
- Deep cleaning can help prolong the lifespan of your appliances by removing any debris or residue that may be hindering their performance.
- A thorough clean can create a safe and hygienic environment for food preparation.
Step-by-Step Kitchen Deep Cleaning Guide

A detailed plan for this process will enable you to do things in an organized way and hopefully not feel overwhelmed by all the work that needs to be done. We are going to break the process down step by step for you and guide you through it.
Remove Everything You Can
You should start with decluttering. If you can get loose items out of the way, your work will go a lot easier. The pots and pans that are sitting around the kitchen, the appliances on the countertops, and anything else that is taking up space should be removed. Put them in another room where they will be out of your way but keep them organized as you do it. You can place them into separate boxes for each area of the kitchen or put them all onto the dining room table as you work.
Getting these items out of the way gives you space to do your work. It will be much easier to wipe down countertops and scrub portions of the kitchen if nothing is in the way.
Work from the Top
The next step is to clean up high, working on the top of shelves, on top of appliances, and on the ceiling. Use a cobweb brush to clean the corners and along the ceiling, as well as on the blades of the ceiling fan, if you have one. Clean the curtains too, by taking them down and putting them into the laundry. By working up high first, you will give yourself less work to do. You don’t want dust and grime to fall down on areas you already cleaned, after all.
Clean Inside Appliances
After those first two crucial steps, you can do most of the kitchen cleaning that is left in just about any order. We will move on to the appliances next. These are probably going to be the most time intensive and difficult items to clean. If they haven’t been cleaned in a while, they may be intimidating. If the appliances are more than you can handle, it’s not a bad idea to call for a professional cleaning service to do this part of the job for you. Deep cleaning services and cleaners for pets can take care of the hardest of jobs and leave the rest for you.
As you clean inside appliances, be sure to remove shelves from the fridge and the racks from the oven to make them easier to clean. This gives you more room to scrub inside the appliances. Be sure to wipe down and dry out inside all of the appliances. You don’t want excess liquid left inside these appliances after you are finished. As you work, be sure the appliances are unplugged for your safety.
Clean Cabinets and Drawers
Over time, your kitchen’s drawers and cabinets will be unclean as well. They may build up oil-based grime or have some dirt and dust in them. You want to start by removing all of the items from these storage areas of your kitchen and then wiping them down or vacuuming them out as necessary. Follow that up with an oil soap to remove stuck-on grime.
As you clean out the drawers and cupboards, be sure to reorganize everything so that it looks neater and is easier to find. Think about which items you want to be easily accessible and which ones could be stored in harder to reach places because they are not going to be used as often.
Wipe Down Counters
We save this part for near the end because you may be using the counter space to rest dirty items as you clean. The counters make a great place to store oven shelves, for example, as you clean the oven out. The counters can be wiped down with a slightly damp cloth and then follow that up with a degreasing spray and disinfectant. If you come across any stubborn grime, like caked-on dough, you can scrape it away with a butter knife or a paint scraper. If any grime is particularly stubborn, just wet it down first and leave it for about 30 seconds to loosen it up before you attempt to remove it.
Clean the Outside of Appliances
This part of the kitchen deep cleaning guide might not be as simple as you think at first. When it comes time to clean the stove, you could do a simple wipe down and be done with it, but that’s not a deep cleaning. Our suggestion is to remove the knobs, burners, and anything else that can be taken off of the stove. Clean those parts individually and then wipe down the empty stovetop, using a degreaser spray to deal with oil spots.
Cleaning the outside of the fridge is easier. You will want a stainless steel cleaner for the outside of steel fridges, and a simple sanitizing spray for plastic fridges. As you deep clean, do take time to get rid of germs, especially in those areas where you will be working with food or where your hands will be touching, says Medline Plus.
Clean the Floors and Walls
The final step is to clean the areas of the kitchen you haven’t touched yet. That’s the walls and floors. A degreasing spray is useful on the backsplash and around the stove. Your floors should be mopped well and allowed to dry naturally for best results. Be sure to put any kitchen mats to wash as you clean. They can collect dirt and crumbs over time and be attractive to pests, so don’t neglect them.
Kitchen Deep Cleaning Checklist
Cleaning Appliances
Start by cleaning your kitchen appliances, such as the refrigerator, oven, microwave, and dishwasher. Remove all items from the appliance, including shelves and drawers, and wipe them down with warm water and dish soap. Use a paste of baking soda and water for stubborn stains or grease. Rinse thoroughly and let dry before placing everything back.
Cleaning Countertops
Next, tackle the countertops. Clear off any clutter and wipe the surface with an all-purpose cleaner. Use a cleaner suitable for the surface of specific materials like granite or stainless steel. Please pay attention to any spills or stains and scrub them gently. Wipe the countertops dry with a microfiber cloth to prevent streaks.
Cleaning Cabinets and Shelves
Empty the cabinets and shelves, discarding any expired or unwanted items. Wipe down the interior and exterior surfaces, including the handles. Use a mild soap mixed with warm water or an all-purpose cleaner. A mixture of baking soda and water can be used for tough grease or grime. Dry everything thoroughly before placing items back.
Cleaning Sink and Faucets
Remove any dishes from the sink and clear any debris or food particles. Clean the sink using a mild abrasive cleaner or a mixture of baking soda and water. Pay special attention to the edges and corners. Scrub the faucet with a toothbrush and soapy water to remove any build-up. Rinse thoroughly and dry with a clean cloth.
Cleaning Floors
Move on to the floors. Start by sweeping or using a vacuum to remove any loose dirt or crumbs. Then, mop the floor using a suitable cleaner or a mixture of warm water and a few drops of dish soap. Pay attention to any stubborn stains and use a scrub brush if necessary. Allow the floor to air dry or dry it with a clean towel.
Cleaning Walls and Backsplash
Inspect the walls and backsplash for any splatters or stains. Use a mild detergent and warm water to clean the surfaces. For tough stains, use a mixture of baking soda and water. Scrub gently with a sponge or cloth, focusing on the affected areas. Rinse with clean water and dry with a towel.
Cleaning Ventilation Systems
It’s essential to clean the ventilation systems in your kitchen to maintain air quality. Remove any vent covers and wash them with warm soapy water. Use a vacuum or a duster to remove dust and debris from the vents. Clean the blades or fan with a damp cloth, and make sure everything is thoroughly dry before reattaching the covers.
Cleaning Light Fixtures
Turn off the lights and allow the light fixtures to cool. Carefully remove any light bulbs and set them aside. Wipe down the fixtures with a damp cloth or a mild cleaning solution. Pay attention to any stains or dust build-up. Dry the fixtures thoroughly before reattaching the light bulbs.
Cleaning Windows and Window Sills
Lastly, clean the windows and window sills. Remove any dust or dirt with a duster or a microfiber cloth. Mix a solution of warm water and white vinegar to clean the windows. Dip a sponge or cloth into the solution, wring out excess liquid, and wipe the windows from top to bottom. Dry the windows and sills with a clean, lint-free cloth.
Tools and Supplies for Kitchen Deep Cleaning
To effectively deep clean your kitchen, you will need a variety of tools and supplies. Here are some essential items to have on hand:
Cleaning Solutions and Chemicals
Having the right cleaning solutions and chemicals is key to tackling different surfaces and stains in your kitchen. For example, you may need an all-purpose cleaner for countertops and cabinets, a stainless steel cleaner for appliances, and a mild abrasive cleaner for sinks and faucets. Make sure to read the labels and follow the instructions for proper use.
Cleaning Tools (brushes, sponges, etc.)
To effectively clean different areas of your kitchen, you will need various cleaning tools. Some essential tools include brushes, sponges, scrub brushes, and microfiber cloths. Use brushes with stiff bristles for scrubbing tough stains, sponges for wiping down surfaces, and microfiber cloths for drying and preventing streaks.
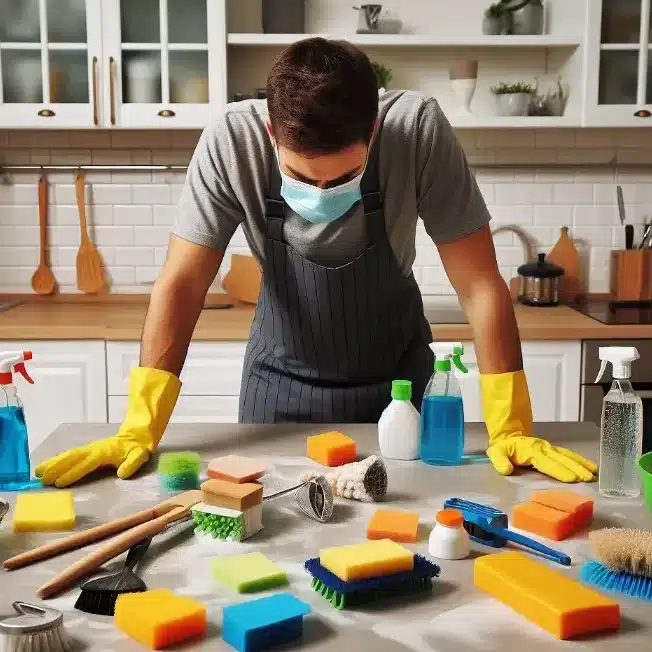
Protective Gear (gloves, masks, etc.)
When deep cleaning your kitchen, protecting yourself from any potential hazards is important. This includes wearing gloves to protect your hands from chemicals and hot water, as well as a mask to prevent inhalation of any fumes. Additionally, consider wearing protective eyewear to prevent any splashes or debris from getting into your eyes.
Cleaning Equipment (vacuum cleaner, steam cleaner, etc.)
While not every kitchen deep cleaning guide requires specialized equipment, having certain cleaning equipment can make the process more efficient. For example, a vacuum cleaner can be used to remove crumbs and dirt from the floors, while a steam cleaner can help deep clean and sanitize surfaces. Consider what equipment may be beneficial for your specific deep cleaning needs.
Storage Containers for Organization
As you clean your kitchen, you may come across items that need to be stored or organized. Having storage containers on hand can help keep your kitchen clutter-free and organized. Use containers to sort and store items that you want to keep but don’t need on a daily basis. This will help create a clean and functional kitchen space.
Common Challenges in Kitchen Deep Cleaning
When it comes to performing a thorough kitchen deep clean, there are several common challenges that you may encounter. Understanding and knowing how to overcome these challenges can help you achieve a sparkling clean and hygienic kitchen.
Grease and Stubborn Stains
One of the most common challenges in kitchen deep cleaning is dealing with built-up grease and stubborn stains. Grease can accumulate on countertops, inside cabinets, and on kitchen appliances, making it difficult to remove. To tackle this issue:
- Start by using a degreasing cleaner or a mixture of dish soap and warm water.
- Scrub the surfaces gently with a sponge or microfiber cloth, paying close attention to the affected areas.
- For stubborn stains, create a paste using baking soda and water, apply it to the stain, and let it sit for a few minutes before scrubbing.
- Rinse thoroughly to remove any residue.
Removing Odors
Another common challenge in kitchen deep cleaning is removing unpleasant odors. Over time, food particles and spills can cause lingering odors in the kitchen. To combat this issue, start by cleaning your garbage disposal. Run cold water and drop a few ice cubes and citrus peels into the disposal, then turn it on to grind them. This will help remove any trapped food particles and freshen the disposal. Additionally, wipe down surfaces with a mixture of white vinegar and water, as vinegar is known for its odor-absorbing properties. Ensure proper ventilation and consider using air fresheners or natural odor absorbers, such as baking soda, to keep your kitchen smelling fresh.
Handling Delicate Surfaces
When deep cleaning your kitchen, you may come across delicate surfaces that require special care. For example, stainless steel appliances and granite countertops can easily get scratched or damaged if improperly cleaned. To handle delicate surfaces:
- Use cleaners specifically designed for the material.
- For stainless steel appliances, opt for a stainless steel cleaner or a mixture of mild dish soap and warm water.
- Avoid using abrasive cleaners or scrub brushes that can scratch the surface.
- For granite countertops, use a granite cleaner or a mixture of warm water and a few drops of dish soap.
- Gently wipe the surface with a soft sponge or cloth, and avoid using acidic or abrasive cleaners that can dull the finish.
Dealing with Hard Water Stains
Hard water can leave unsightly stains on faucets, sinks, and glassware, making it a common challenge in kitchen deep cleaning. To remove hard water stains:
- Start by soaking a cloth in white vinegar and wrap it around the affected area.
- Let it sit for about 15 minutes to allow the vinegar to break down the mineral deposits.
- Scrub the area gently with a soft brush, then rinse thoroughly with warm water.
- For glassware, soak them in a mixture of equal parts white vinegar and warm water for about 30 minutes before washing them as usual.
Cleaning Hard-to-Reach Areas
Deep cleaning your kitchen often means tackling hard-to-reach areas, such as the spaces behind appliances, inside narrow crevices, and on top of cabinets. To clean these areas, start by moving your appliances, such as the refrigerator and stove, away from the walls. Use a vacuum cleaner with a crevice attachment to remove any dust, debris, or food particles. For narrow crevices, use a small brush or toothbrush to dislodge any dirt or grime, then vacuum it up. To clean on top of cabinets, use a duster or a microfiber cloth attached to a long-handled mop or broom. If necessary, use a ladder or step stool to reach higher areas.
Expert Tips for Efficient Kitchen Deep Cleaning
Keeping your kitchen clean and organized is essential for maintaining a healthy and functional space. Regular cleaning may help, but every once in a while, you need to go the extra mile and give your kitchen a deep clean. This article will provide you with expert tips for efficient kitchen deep cleaning, ensuring that no area is left untouched.
Create a Cleaning Schedule
One of the most important tips for efficient kitchen deep cleaning is to create a cleaning schedule. By having a plan in place, you can break down the tasks into manageable chunks and spread them out over a period of time. This approach prevents overwhelm and allows you to focus on one area at a time, ensuring thorough cleaning.
Utilize Time-Saving Techniques
To make your deep cleaning process more efficient, it’s essential to utilize time-saving techniques. For example, use multi-purpose cleaning products suitable for various surfaces when cleaning appliances. This eliminates the need for different cleaners and saves time in the process. Additionally, consider using steam cleaners or microfiber cloths, which can effectively remove dirt and grime without excessive scrubbing.
Work from Top to Bottom
Working from top to bottom is a key strategy for efficient kitchen deep cleaning. Start by cleaning the highest surfaces, such as cabinets and light fixtures, and gradually work your way down to the lower surfaces, such as countertops and floors. This approach ensures that any dust or debris falls downward and can be easily cleaned up during the process.
Use Appropriate Cleaning Products for Different Surfaces
Using appropriate cleaning products for different surfaces is crucial for efficient kitchen deep cleaning. Make sure to read labels and choose cleansers that are specifically designed for the materials you are cleaning. For example, use stainless steel cleaner for appliances, granite cleaner for countertops, and all-purpose cleaners for cabinets and shelves. This not only ensures effective cleaning but also prevents damage to the surfaces.
Involve Family Members or Roommates
Make sure to tackle the kitchen deep cleaning task with help. Get your family members or roommates involved in the process. Divide the tasks among everyone and work together as a team. This lightens the workload and fosters a sense of shared responsibility and accomplishment. Assign specific tasks to each person, such as cleaning the refrigerator or wiping down the cabinets, and set a timeframe to complete them.
By following the kitchen deep cleaning guide, you can achieve a sparkling clean and organized space without feeling overwhelmed. Remember to create a cleaning schedule, utilize time-saving techniques, work from top to bottom, use appropriate cleaning products, and involve your family members or roommates. With these strategies in place, your kitchen will be fresh, hygienic, and ready for all your culinary adventures.